
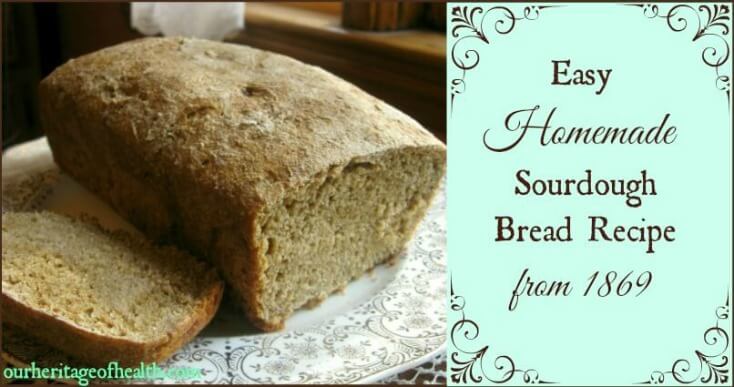
If you’re not used to baking homemade bread, making sourdough bread might sound a bit intimidating at first, but once you get used to it, this bread is really much easier than “regular” yeasted bread.
This easy homemade sourdough bread only needs to be kneaded once, and after that you can just put it in the same pan you’re going to bake it in and let it rise overnight. Then, the next morning when it has risen, all you have to do is put it in the oven and you’re done.
This sourdough bread recipe is also easier because sourdough yeast is much more flexible as far as time is concerned than store bought yeast is. You don’t have to watch it as closely to monitor the rising time. Rather than planning your time around being there to check the dough and knead, and let it rise and knead again, etc. all you have to do is prepare the dough the day before and let it rise overnight. And if you’re really busy and it rises a little bit longer than you had planned, it’s not a big deal, and most of the time the bread will still turn out perfectly fine even if the dough is a bit over-risen.
First Things First
This bread recipe calls for homemade yeast. There were different variations of homemade yeast back in the 1800s when the recipe was written, but I chose to use a sourdough starter for my homemade yeast since I think it’s the simplest to use and to maintain. In order to make this recipe, you’ll need an established sourdough starter.
If you’ve never used a sourdough starter before, you can find out more about how to begin and maintain one in these posts:
- How to Make Homemade Yeast
- Tips for Using and Maintaining a Sourdough Starter ~ Part 1
- Tips for Using and Maintaining a Sourdough Starter ~ Part 2
An Old-Fashioned Recipe
Once you’ve got your sourdough starter established, it’s time to move on to the actual bread-making itself. This recipe is one I found in an old recipe pamphlet from 1869.
~ Original Recipe ~
“One coffee-cup flour; two coffee-cups Graham flour, one coffee cup warm water, half coffee cup yeast, a little molasses, a teaspoon of salt, half teaspoon soda dissolved in the water. Make as stiff as it can be stirred with a spoon. Let it rise over night, and bake about an hour in a moderate oven. This quantity makes one loaf.”
~ Mrs. Winslow’s Domestic Receipt Book for 1869 ~ Pg. 4
~ Modern Adaptation ~
Ingredients:
- 3 cups flour *
- 1 cup warm water **
- 1/2 cup sourdough starter
- 2 Tbs. molasses (or whole cane sugar)
- 1 tsp. salt
- (Optional: 1/2 tsp. baking soda)
* To be historically accurate, you can use two cups of whole wheat flour and one cup of all-purpose flour. To be really historically accurate, though, the best flour to use would be an heirloom flour like spelt or einkorn. Einkorn flour is the one that I’ve been using the most of lately to make my bread.
** If you use einkorn flour, reduce the amount of water to about 3/4 cup.
Directions:
- In a large mixing bowl, combine flour and salt, stirring until combined.
- Add sourdough starter, molasses, and warm water, stirring until combined. Unlike other bread recipes, the dough for this bread will feel wet and sticky rather than dry.
- (Optional: If you do not want any sour flavor or tang in your finished loaf, add the 1/2 tsp. of baking soda and mix until well combined.)
- Knead the wet dough for a minute or two. This part will be messy. I usually just keep the dough in the bowl to knead it to avoid extra mess on the counter.
- Place dough into a greased 9×5 inch bread pan. Cover with a damp dish cloth or tea towel, with another dry towel over it and let rise for 12-24 hours. You want the dish towel touching the bread to stay damp because that will help to prevent the top of the dough from drying out and forming a crust, which could prevent the dough from rising as much. (I find it convenient to prepare my bread dough somewhere between afternoon and suppertime the day before and then let it bake the next morning while I’m having breakfast.)
- Once it has risen, the dough should be light and fluffy and form an indentation when you press your finger into it. (If you have a glass bread pan, you can see little bubbles in the dough through the sides and bottom of the pan.)
- Bake at 350 degrees for about 45-50 minutes or until bread is golden brown and sounds hollow when you tap on it.
Recipe Notes:
- The length of time the bread needs to rise may vary depending on the time of year and the temperature in your home. In warmer weather, it will take less time to rise than it will in cooler weather. (Mine usually takes about 14-16 hours to rise in the summer and about 18-20 hours to rise in the winter.)
- The water for this recipe should be warmer when you bake during the winter months and cooler for the summer months.
- True, authentic sourdough bread is usually made without the addition of baking soda. Many 19th century recipes call for the use of baking soda in yeasted breads and baked goods, though, as a way to neutralize the sour flavor and create a sweeter taste. Some sourdough starter strains are stronger than others, so depending on the region in which you live and on your individual preference, you can add or omit the baking soda as you choose.
[socialpug_share]


I would like to try this recipe with flour from wheat I grind myself Would you be able to suggest which type of wheat? I have hard white wheat berries and hard red wheat berries. Thank you
Either one of those kinds should be fine to use, so the choice would really be up to your preference if you like the flavor of one over the other, or if you have a larger supply of one type over the other, etc.
This is becoming one of my favorite sourdough recipes! I’ve been baking for more than 40 years and I always come back to a blend of WW and unbleached AP or bread flour with a little bit of molasses. These never rise really high, but I have learned that you don’t need to double in size to get an excellent loaf. Thanks for a great recipe!
I’m glad to hear that the recipe is working out well for you! It’s one of my favorites too! 🙂
I’ve been experimenting with sourdough for a couple months now. I made this bread for the second time and boy did it rise perfectly (the first time not so much). It’s in the oven right now and the house smells amazing.
I’m glad to hear that it rose so well for you the second time. And, yes, the smell of bread baking in the oven is always amazing! 🙂
Hi, Lori!
I am interested in the cookbook, but am wondering if it is only available in the PDF format? I want a hard copy. I THINK the link for $4.99 is for a hard copy, but am not sure. Can you clarify for me? Thanks.
Hi Jan, I’m sorry, but it’s only available as a pdf. I know hard copies are really nice to have, and it something I might consider looking into for the future (I’m not sure how easy or economical it is to create hard copies on your own without going through a publisher), but for right now the book is only available as a pdf download.
Have you tried making it with sprouted whole wheat or sprouted spelt flour?
I haven’t tried making this bread with either type of sprouted flour, but I think sprouted flour should probably still work fine. I can’t say 100% for sure since I haven’t tried it personally, but I don’t think sprouted flour would make a significant difference in how the bread would rise or bake, so I think it would be ok to use.
I made this bread along with another bread recipe on Sunday. I was figuring I wouldn’t have much luck, as it seems like bread is something that takes some experimenting with to get it right. This recipe turned out so good, it had a great sourdough flavor but not overbearing, was pretty light in texture, and my family loved it. We’ve been using it this week along with dinner & making sandwiches with it! I’m so thankful for the guidance and looking forward to trying more recipes using my starter 🙂
I’m so glad to hear that the recipe turned out well for you! Thanks for coming back to leave a comment! 🙂
This is by far the best and easiest recipe I have found.
Thank you! I’m glad to hear that you found it to be an easy recipe!
Hi, I tried many nread recipes before I found this one. I used stoneground flour (available in South Africa) and just started using sourdough starter. This recipe is perfect! Even my husband likes the taste and structure of this bread, and that says a lot For many years I have avoided eating any store bought bread for the reason of bloating and cramping. I did some research on different flours readily available in my country and started using stoneground, unbleached bread- and cake flours. It is quite a heavy flour and a lot of recipes isn’t a sucess when using it. I am just a newby at baking, and this is the first bread recipe that is a perfect success! Than you! I must add that the first time I baked this bread, I let it rise overnight and baked it without a second rise. It did rise a bit in the oven but not ss much as I wanted. Thereafter I did a second rise and the rise lifted, became light and airy. Would have liked to post a photo, but it seems I do not have that option here. Have a nice day!
I’m so glad to hear that the bread turned out well for you and that it was a success! I haven’t ever tried this bread with a second rise, but that’s great that it turned out light and airy for you, and it’s good to know that the recipe works for stoneground flours. I’m not sure where an option would be to post a photo either, but thanks for sharing your experience, and I hope you have a nice day too!
I tried this recipe and followed to the letter. I used the Einkorn wheat and 3/4 cup water as you suggested. The dough was dense and tough. I left it in the refrigerator overnight and baked it in the morning. Should I have left it out on the counter to warm up and rise before baking it? It came out very dense and heavy as if it had no yeast at all. The starter I used was one I have used and is very active. Can you tell me what I may have done wrong?
I’m sorry to hear that your loaf didn’t turn out well. My guess is that it was too cold in the refrigerator for the yeast to work and for the bread to rise. I’ve actually read that putting your dough in the fridge is a way to slow down the rising process if you’re not ready to bake bread yet and you want to stop it from rising. Yeast usually likes a fairly warm temperature, so if your starter was very active, the cold temperature in the fridge probably just slowed down the rising process so much that it was still dense by morning. I leave my dough out on the counter overnight to rise, and in the winter time when it’s colder in the house it usually takes at least 12 hours to rise (but usually longer), and in the summer when it’s really warm out my dough rises much faster. So warmer temperatures definitely have an effect on how fast and how much the dough will rise. If you try leaving your dough out on the counter hopefully you’ll have better success in the future!
I just realized what I did! You never suggested putting it in the refrigerator! I don’t know where I got that idea! You can delete this response if you like! I will try again!
I hope it works better for you the second time! And I’ll keep the comment up in case it helps anyone else who might try the same thing 🙂
Thanks! I have a new all-purpose flour starter going, and it’s ready to divide. I’ll give that a try.
I hope it goes well! 🙂
I want to make 100% spelt sourdough bread, so I tried making the starter with spelt flour, but it apparently failed. I thought the starter was ready, so I mixed my bread dough, and left to rise overnight. Over 12 hours later, the dough had not risen at all. I checked my starter in the jar, and it seemed to have died. Although I had been extremely careful, maybe it somehow became contaminated. I just threw it all out and want to start over with all-purpose flour for the starter.
After the starter becomes well established in a few weeks while feeding with all-purpose, can I switch to spelt flour for feeding, or must feeding continue with the same type of flour the started was originally started with?
This is something I’ve never tried myself, so I can’t say for sure that it will work from personal experience, but I think that there’s probably a good chance that it could work if you added in the spelt flour slowly a little bit at a time. What I would recommend doing is to split your established all-purpose starter in half and continue feeding one half of it with the all-purpose flour (so that you have a backup starter in case the spelt one doesn’t end up working out) and then for the second starter you could try gradually adding in a bit more spelt flour with each feeding until eventually it’s all spelt flour. Even though I’ve only ever used all-purpose flour for my starter, it makes sense that spelt should be a workable flour to use because people back in history were making sourdough starters with flour that was probably closer to spelt flour than to our modern-day all-purpose flour. So it seems like it *should* work.
I have a simple, no knead sourdough recipe that I love. I got it online a few years back.
3 c of any flour
1 1/2 c water
1/2 tsp active dry yeast
1 1/2 tsp salt
Just combine the ingredients n let sit for 14-24 hrs on floured board with a greased bowl covering it. Preheat oven to 475° with a covered dutch oven in there to preheat, too. When temp is reached pop the dough in and cook for 30 mins covered and 15 mins uncovered. Remove from dutch oven to cooling rack immediately after bake and cool for atleast 15 mins before cutting.
I think I will make a starter and use that for part of the flour n water and omit the store yeast. What do you think?
Yes, I think that sounds like it would be a great idea to try that substitution. I’ve found that usually about a 1/2 cup of homemade starter is usually about the equivalent of one packet of store bought active dry yeast, so you could maybe try that. Hope it turns out well for you!
Can you make a loaf without using other flours? I only have unbleached flour and cannot find spelt or einkorn flour where I live.
Oh yes, regular unbleached all purpose flour will be just fine. The Spelt and einkorn are optional. The only flour I wouldn’t recommend is a gluten-free flour since this bread isn’t designed to be a gluten free recipe, but any regular gluten-containing flour should be fine.
Can’t wait to try this! When making and maintaining starter, is it correct you are adding 3 1/2 cups of flour total a week to keep it alive? Seems like a lot of flour. 14 cups per month plus baking flour.
When I’m feeding my starter to keep it alive I usually feed mine about 1/2 cup of flour (I don’t actually usually measure it out, but I put in a scoop that’s probably somewhere between 1/3-1/2 a cup.) And I usually feed mine 3-4 times a week. In the summer time mine seems to need to be fed a bit more often, so I feed it four times a week, and in the winter when my house is colder I can get away with only feeding it 3 times a week. So I usually end up using somewhere around 1 1/2 cups a week to feed it (maybe as much as 2 if it’s summer time.)
If you’re not planning on baking with it more than a couple of times a month, though, you can actually keep it in the fridge to slow down the growth so you won’t have to feed it as often. The only thing is that you have to plan a bit ahead before you bake because you have to take it out of the fridge a couple of days before you plan on using it so it has time to warm up back to room temperature, and then you have to feed it and let it reactivate before you use it in a recipe.
Hi Lori,
I tried this recipe today after building a yeast starter for the week. So, newbie question… do you stir the starter yeast before adding it to the recipe? (I did.)
That’s a good question, and as far as I know, I don’t think it would make a huge difference to the recipe either way. I’m not a scientist, so I don’t know all of the technical stuff about the reaction of the yeast starter to the dough and how stirring might possibly effect that, but since you would be stirring all of the ingredients (including the yeast starter) together anyways while mixing up the bread dough, I don’t think it would hurt to stir it first. That being said, I don’t know that it would really be necessary to stir it first either since it’s going to be stirred together anyways with the flour and water. So stirring it first might just be an extra step in the process that you could skip. (I’ve never stirred mine first before adding it and my bread has turned out fine anyways.)